Grease on kitchen cabinets is not just a simple cleaning problem. It is a combination of airborne cooking oil, steam, dust, food particles, and repeated heat exposure. Over time, this greasy film becomes sticky, yellowish, and increasingly difficult to remove—especially on cabinet doors near the stove, range hood, handles, and upper wall cabinets.
This guide explains how to remove grease from cabinets safely, why old kitchen grease becomes stubborn, and how to choose the right cleaning method for different cabinet finishes, including wood, wood veneer, painted cabinets, lacquer, melamine, laminate, acrylic, PET, thermofoil, and textured cabinet doors.
Why Kitchen Cabinets Get Greasy
Kitchen cabinet grease usually comes from cooking activities such as frying, stir-frying, sautéing, grilling, and high-heat oil cooking. When oil is heated, tiny grease droplets become airborne and settle on nearby surfaces. Cabinets above and beside the cooktop are especially vulnerable because they are close to heat, steam, and oil splatter.
Fresh grease may feel slightly oily and can often be removed with warm water and mild dish soap. However, when the grease stays on cabinet surfaces for weeks or months, it mixes with dust and undergoes chemical changes. That is why old grease on kitchen cabinets often feels sticky rather than simply oily.
Research on oily grime formed on hard kitchen surfaces found that kitchen grime is mainly composed of oxidized and polymerized triacylglycerols. In simple terms, cooking oil can age, oxidize, and form larger sticky compounds that bond more strongly to surfaces. This helps explain why old cabinet grease is harder to remove than fresh oil splatter.

Why Old Grease Is Harder to Remove
Old kitchen grease is difficult to clean because it changes over time.
Fresh grease is loose and soft. A mild surfactant-based cleaner, such as diluted dish soap, can break it up and lift it away. Old grease is different. Heat and air exposure gradually change the oil film. It can become oxidized, polymerized, and mixed with dust or fibers, creating a sticky layer that clings to cabinet doors.
This is also why aggressive scrubbing is not always the best solution. On many cabinet finishes, especially lacquer, painted wood, veneer, high-gloss panels, and matte surfaces, strong friction can damage the finish before it removes the grease. The better approach is to let chemistry do most of the work: soften the grease, emulsify it, wipe gently, rinse, and dry.
The American Cleaning Institute explains that surfactants reduce water’s surface tension, allowing water to spread and wet the surface more effectively. Surfactants can also help surround oily soils and suspend them in water so they can be rinsed away.
Before You Start: Identify the Cabinet Finish
Before removing grease from kitchen cabinets, identify the cabinet surface. The safest cleaner for one finish may be too harsh for another.
Common kitchen cabinet surfaces include:
- Solid wood cabinets
- Wood veneer cabinets
- Painted cabinets
- Lacquer cabinets
- High-gloss UV lacquer cabinets
- Melamine cabinets
- Laminate or HPL cabinets
- Thermofoil or PVC-wrapped doors
- Acrylic or PET cabinet doors
- Matte finish cabinet doors
- Textured or fluted cabinet panels
- Glass, aluminum frame, or stainless-steel details
If you are not sure what finish you have, start with the mildest method: warm water, a few drops of dish soap, a soft microfiber cloth, and immediate drying.
The Safest Basic Method to Remove Light Grease from Cabinets
For light cabinet grease, use this gentle method first.
What You Need
- Warm water
- Mild dish soap
- Two soft microfiber cloths
- A clean dry towel
- Optional: soft toothbrush for handle edges and grooves
Step-by-Step Method
- Mix a few drops of mild dish soap into a bowl of warm water.
- Dip a microfiber cloth into the solution and wring it until damp, not dripping.
- Wipe the greasy cabinet surface gently.
- For handles, corners, and door edges, use a soft toothbrush with light pressure.
- Wipe again with a clean cloth dampened with plain water.
- Dry the cabinet immediately with a soft towel.
Utah State University Extension also recommends cleaning grease-covered cupboards with dish soap and warm water, followed by wiping and drying.
This method works well for regular weekly cleaning and light grease buildup on most cabinet finishes.
How to Remove Sticky Grease from Kitchen Cabinets
For sticky grease on kitchen cabinets, the process should be slower and more controlled. Do not begin with harsh degreasers or abrasive pads.
Step 1: Soften the Grease
Apply warm soapy water to a small area and let it sit for one to two minutes. Do not soak the cabinet. The goal is to soften the grease film without allowing water to penetrate seams, edges, veneer joints, or unfinished areas.
Step 2: Wipe with a Microfiber Cloth
Use gentle circular motions or straight strokes, depending on the finish. For wood or veneer, wipe with the grain. For high-gloss or lacquer panels, use straight, light strokes to reduce visible swirl marks.
Step 3: Use a Mild Baking Soda Paste Only When Needed
For stubborn spots, mix baking soda with a small amount of water to form a soft paste. Apply it only to the greasy spot, rub very gently, then remove immediately with a damp cloth and dry.
Important: baking soda is mildly abrasive. It may be acceptable for some durable laminate or melamine surfaces, but it should be used very carefully on lacquer, high-gloss, acrylic, painted, and dark matte finishes. Always test in a hidden area first.
Step 4: Rinse and Dry
Any cleaner left on the cabinet surface may attract more dust or create dull patches. Always wipe with clean water and dry immediately.
How to Clean Grease from Different Cabinet Finishes
Not all cabinet grease should be treated the same way. The smartest method depends on how the surface holds grease: some finishes trap oil in wood grain, some show greasy fingerprints, some are sensitive to friction, and some are vulnerable at the edges rather than the flat surface.
Instead of using one cleaner for every cabinet door, use the right technique for the finish.
1. Solid Wood Cabinets: Lift Grease from the Grain, Not Against It
Solid wood cabinets often trap grease inside natural grain lines, raised panels, and decorative profiles. If you scrub across the grain, you may spread the oil deeper into the texture or leave uneven marks.
Smart method:
Use a lightly damp microfiber cloth and wipe with the grain, not in circles. For greasy grooves or carved details, wrap the cloth around a soft toothbrush or use a very soft detailing brush. This helps lift grease out of the grain without scratching the protective coating.
For older wood cabinets, clean one small section first, then dry it immediately. If the finish looks dull or sticky after cleaning, the issue may be old polish buildup rather than only cooking grease.
Avoid: soaking the wood, steam cleaning, strong alkaline degreasers, steel wool, and repeated hard scrubbing.
2. Wood Veneer Cabinets: Protect the Edges First
Wood veneer cabinets have a thin layer of natural wood over a stable substrate. The flat surface may handle gentle cleaning well, but edges, seams, and corners are more sensitive. Grease often collects around these weak points.
Smart method:
Clean the center of the panel first, then treat the edges with a barely damp cloth. For greasy seams, fold a microfiber cloth into a narrow edge and slide it gently along the joint. This gives better control than spraying cleaner directly onto the door.
If there is grease near the edge banding, apply cleaner to the cloth, not the cabinet. This prevents liquid from entering the veneer seam.
Avoid: wetting edges, using spray cleaners directly on the door, steam, and abrasive pads.
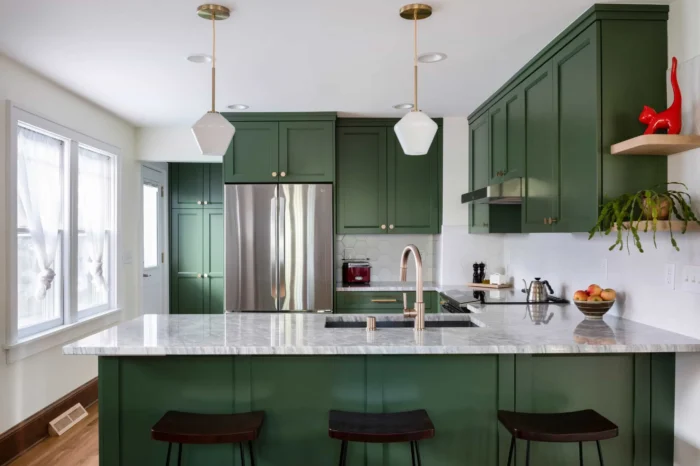
3. Painted Cabinets: Use the “Handle Zone” Method
Painted cabinets often become greasy around the handle area before the rest of the door looks dirty. This is especially obvious on white, cream, gray, and sage green painted cabinets.
Smart method:
Focus on the handle zone first. Hold a warm damp cloth over the greasy area for 20–30 seconds to soften hand oil and cooking grease, then wipe outward in light strokes. This prevents you from spreading concentrated grease across the entire painted surface.
For shaker painted doors, clean the inner frame corners with a cotton swab or a soft toothbrush wrapped in cloth.
Avoid: magic erasers on visible painted areas unless approved, strong degreasers, bleach, and heavy spot-scrubbing that may create dull patches.
4. Lacquer Cabinets: Remove Grease Without Creating Micro-Scratches
Lacquer cabinets, especially dark or high-gloss lacquer, can show swirl marks if wiped aggressively. The challenge is not only removing grease, but keeping the surface smooth and even.
Smart method:
Use a two-cloth system. The first microfiber cloth loosens grease with diluted mild soap. The second clean, dry microfiber cloth immediately buffs the surface dry in straight lines. This reduces streaks and prevents water marks.
For glossy lacquer, never dry-wipe dust before cleaning. Dust particles can behave like fine abrasives.
Avoid: paper towels, baking soda paste, rough sponges, alcohol-based cleaners, and circular hard rubbing.
5. High-Gloss Cabinet Doors: Clean Like Glass, But More Gently
High-gloss cabinet doors show every greasy fingerprint, especially under direct lighting. If cleaned incorrectly, they may develop cloudy patches or fine scratches.
Smart method:
First remove loose dust with a dry microfiber cloth using very light pressure. Then wipe with a barely damp cloth and diluted dish soap. Finish with a dry cloth using one-direction strokes, not circular polishing.
For greasy fingerprints, press the damp cloth on the mark for a few seconds before wiping. This softens the oil and reduces friction.
Avoid: dry rubbing, paper towels, powdered cleaners, rough cloths, and repeated polishing in circles.
6. Melamine Cabinets: Use Controlled Pressure on Textured Areas
Melamine cabinet doors are practical and relatively easy to clean, but wood-grain melamine or matte melamine can hold grease in tiny surface textures.
Smart method:
Use a microfiber cloth folded into a flat pad and apply even pressure. For textured melamine, wipe in the direction of the printed grain. If grease remains in the texture, use a soft toothbrush with mild soapy water, then wipe the area with a clean damp cloth.
For rental kitchens or heavy-use apartments, melamine is often a good choice because it can handle regular cleaning better than many delicate decorative finishes.
Avoid: soaking exposed edges, strong solvents, and abrasive scouring pads.
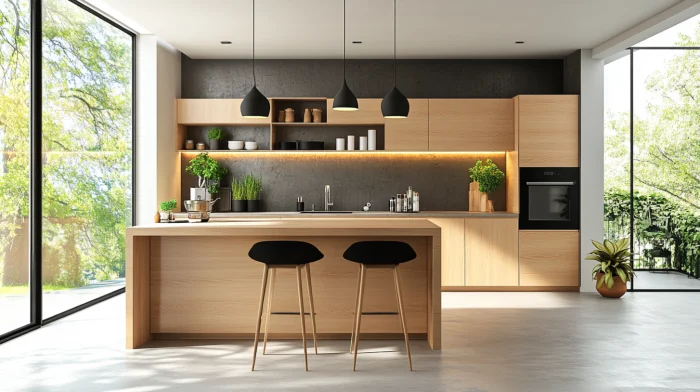
7. Laminate and HPL Cabinets: Break the Grease Film Before Scrubbing
Laminate and HPL are durable, but old grease can still form a stubborn film on the surface. Because these materials are more resistant than lacquer or veneer, you can use a slightly more active cleaning technique.
Smart method:
Place a warm damp cloth over the greasy area for one minute to soften the oil film. Then wipe with mild dish soap solution. For stubborn grease on flat laminate, use a plastic card wrapped in microfiber cloth to gently push away softened grease without scratching the surface.
This method is especially useful for grease lines near cabinet handles or the underside of upper cabinets.
Avoid: metal scrapers, steel wool, harsh powder cleaners, and leaving liquid near seams.
8. Thermofoil or PVC-Wrapped Doors: Keep Heat and Liquid Away from the Edges
Thermofoil and PVC-wrapped cabinet doors are usually easy to wipe on the flat surface, but the wrapped edges are sensitive to heat, steam, and harsh chemicals.
Smart method:
Clean the middle of the panel normally, but clean edges with a nearly dry cloth. If grease collects along the wrapped edge, use a cotton swab lightly dampened with soapy water, then dry the edge immediately.
For kitchens with heavy frying or steaming, check cabinets near the oven, kettle, rice cooker, and cooktop more often because heat can weaken wrapped edges over time.
Avoid: steam cleaners, hot wet cloths, strong degreasers, and letting cleaner sit near the edge.
9. Acrylic Cabinet Doors: Remove Dust Before Touching the Grease
Acrylic doors can look sleek and premium, but glossy acrylic is easy to scratch if grease is wiped together with dust.
Smart method:
Use a dry microfiber cloth to lightly lift dust first. Then use a second microfiber cloth with mild soapy water to clean the grease. For fingerprints, do not rub immediately. Let the damp cloth rest on the mark briefly, then wipe in straight lines.
If the acrylic is dark or reflective, clean the whole visual section rather than only one greasy spot. This prevents uneven shine.
Avoid: baking soda, paper towels, alcohol cleaners, abrasive pads, and dry rubbing.
10. PET and Super-Matte Cabinet Doors: Avoid Creating a Shiny Spot
PET and super-matte finishes often show grease as dark smudges rather than shiny oil. The biggest cleaning risk is rubbing one area too much and creating a polished patch.
Smart method:
Use a diluted mild soap solution and wipe a wider area around the grease mark, not just the spot itself. Blend the cleaning motion outward so the surface dries evenly. For finger marks, use light repeated passes instead of strong pressure.
This “feathering” method helps avoid visible cleaning halos on matte cabinet doors.
Avoid: spot-scrubbing, wax, oil-based cleaners, polishing cloths, and strong alkaline degreasers.
11. Textured, Fluted, or Grooved Cabinet Doors: Use Foam, Not Excess Water
Fluted, ribbed, shaker, routed, and 3D-textured cabinet doors look beautiful but can hold grease inside grooves. If too much water is used, cleaner may remain trapped in the details.
Smart method:
Use a small amount of cleaning foam or a lightly damp soft brush. Work along the groove direction, then use a dry microfiber cloth wrapped around a card or fingertip to absorb loosened grease from the lines.
For vertical grooves, clean from top to bottom and keep a dry cloth below the cleaning area to catch dirty liquid before it runs down.
Avoid: flooding grooves with water, hard brushes, metal tools, and leaving soap residue in the lines.
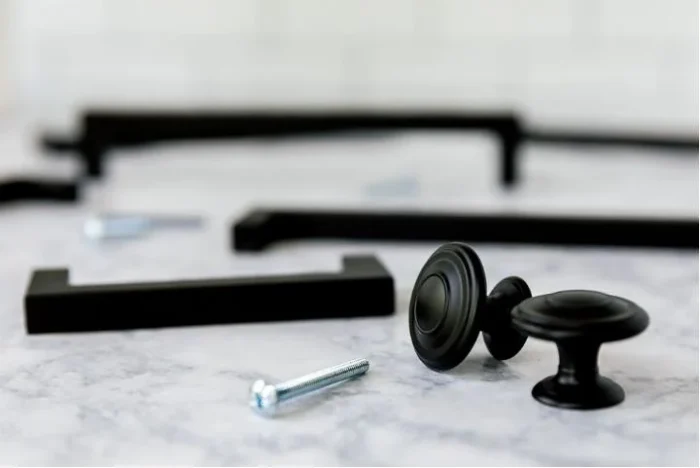
12. Glass, Aluminum Frame, and Metal Details: Clean the Mixed Materials Separately
Cabinets with glass inserts, aluminum frames, stainless-steel trim, or metal handles need more controlled cleaning because one cleaner may not be safe for every material.
Smart method:
Spray glass cleaner onto a cloth, not directly onto the cabinet. Clean glass first, then wipe the frame separately with mild soapy water. For greasy metal handles, wrap a damp cloth around the handle and twist gently to remove oil from the underside.
For narrow gaps between glass and frame, use a cotton swab instead of spraying liquid into the joint.
Avoid: spraying cleaner directly onto mixed-material doors, letting glass cleaner run into wood or lacquer, and using abrasive metal pads.
Quick Material-Based Grease Removal Guide
| Cabinet Finish | Grease Problem | Smarter Cleaning Technique | Key Risk |
|---|---|---|---|
| Solid wood | Grease trapped in grain | Wipe with the grain and use soft detailing tools | Water damage and finish wear |
| Wood veneer | Grease near seams and edges | Apply cleaner to cloth, not directly to door | Edge swelling or veneer lifting |
| Painted cabinets | Greasy handle zones | Warm cloth pre-softening around handles | Dull patches from over-scrubbing |
| Lacquer | Fingerprints and streaks | Two-cloth clean-and-buff method | Micro-scratches |
| High-gloss | Visible oil marks | One-direction wiping after dust removal | Swirl marks |
| Melamine | Grease in surface texture | Even-pressure wiping along texture | Edge moisture |
| Laminate / HPL | Old grease film | Warm compress plus microfiber-wrapped plastic card | Scratching from hard tools |
| Thermofoil / PVC | Grease at wrapped edges | Cotton swab and immediate drying | Heat and edge peeling |
| Acrylic | Grease mixed with dust | Dust first, then damp clean | Fine scratches |
| PET / super-matte | Dark greasy smudges | Feather cleaning outward from the spot | Shiny cleaning halos |
| Fluted / grooved doors | Grease inside lines | Foam cleaning and dry cloth detailing | Residue in grooves |
| Glass / metal details | Oil fingerprints | Clean each material separately | Cleaner runoff into joints |
What Not to Use on Greasy Cabinets
Avoid the following unless your cabinet manufacturer specifically approves them:
- Oven cleaner
- Bleach
- Ammonia
- Steel wool
- Scouring pads
- Abrasive powders
- Undiluted vinegar on wood or natural veneer
- Strong alkaline degreasers on lacquer or painted surfaces
- Steam cleaners
- Excessive water
- Silicone or wax polish used as a shortcut for grease removal
Several cabinet care guides warn against harsh detergents, abrasive cleaners, steel wool, bleach, ammonia, and excessive moisture because these can damage cabinet finishes.
Cabinet-Safe Degreaser: What to Look For
If dish soap and warm water are not enough, choose a cabinet-safe degreaser carefully.
Look for:
- Label language such as “safe for painted surfaces” or “safe for cabinets”
- Low-odor, non-abrasive formula
- No bleach
- No ammonia
- No strong solvent smell
- Clear rinse instructions
- Compatibility with wood, laminate, or painted surfaces
The EPA Safer Choice program helps consumers and commercial buyers identify cleaning products that perform while using ingredients with safer human health and environmental profiles.
Even with a safer cleaner, test first in a hidden area. Cabinet finishes vary by manufacturer, age, coating thickness, and installation environment.
How to Prevent Grease Buildup on Kitchen Cabinets
The best way to remove grease from cabinets is to prevent heavy buildup in the first place.
Use the Range Hood Early
Turn on the range hood before cooking oil starts smoking or splattering. Ventilation helps reduce airborne grease before it settles on cabinet doors.
Wipe High-Risk Areas Weekly
Clean these areas more often:
- Cabinets above the cooktop
- Cabinet doors beside the stove
- Range hood panels
- Handles and pulls
- Undersides of upper cabinets
- Open shelves near the cooking zone
Clean Small Grease Spots Immediately
Fresh grease is much easier to remove than aged grease. A quick wipe after cooking can prevent yellow sticky buildup.
Choose the Right Cabinet Finish for Heavy Cooking
For households that cook frequently, especially with frying or stir-frying, cabinet finish selection matters. Practical options include:
- Melamine for cost-effective durability
- Laminate or HPL for easy maintenance
- Textured wood-grain finishes that hide light fingerprints
- Satin finishes instead of ultra-glossy doors
- Moisture-resistant substrate near sink and cooking areas
Design for Easier Cleaning
In project kitchens, hotels, apartments, and rental properties, easy maintenance should be considered during design. Flat slab doors are usually easier to wipe than deep shaker profiles. Integrated handles may reduce hardware cleaning, but groove handles can collect grease if placed near the cooktop.
Best Cabinet Materials for Grease-Prone Kitchens
If grease resistance and easy cleaning are priorities, consider the following cabinet material strategy.
For Heavy Home Cooking
Recommended:
- Melamine cabinet doors
- HPL or laminate doors
- PET or acrylic with proper care
- Satin lacquer instead of high-gloss lacquer
- Flat slab doors with minimal grooves
Why: these surfaces are easier to wipe and less likely to trap grease in decorative profiles.
For Rental Apartments and Multi-Family Projects
Recommended:
- Melamine
- Laminate
- HPL
- Durable edge banding
- Simple handle systems
Why: rental kitchens need consistent performance, lower maintenance costs, and easy turnover cleaning.
For Luxury Kitchens
Recommended:
- High-quality lacquer
- Natural wood veneer with protective coating
- Matte PET or premium acrylic
- Mixed material design with easy-clean zones near cooking areas
Why: luxury kitchens can combine design aesthetics with practical surface engineering. The key is to use more delicate finishes away from heavy grease zones and more durable finishes near the cooktop.
For Hotel, Apartment, and B2B Projects
Recommended:
- Project-grade melamine
- Laminate/HPL
- Moisture-resistant substrates
- Standardized finish systems
- Easy-replacement door panels
Why: B2B projects need repeatable quality, stable delivery, and predictable maintenance. A beautiful cabinet finish must also survive daily use.
Grease Cleaning Starts with Better Cabinet Selection
For kitchen cabinet projects, grease resistance is not only a cleaning issue. It is also a material selection and manufacturing issue.
PA Home provides whole-home customized solutions across cabinets, walls, doors, windows, and bathrooms, serving residential, commercial, and hospitality projects. With global project experience and digital manufacturing systems, PA Home can support cabinet finish selection based on local cooking habits, climate, maintenance expectations, and project budget.
For grease-prone kitchens, PA Home can help developers, designers, contractors, and homeowners consider:
- Which cabinet finish is easier to clean
- Whether melamine, laminate, lacquer, PET, acrylic, or wood veneer is more suitable
- How edge banding affects long-term moisture and grease resistance
- How handle design affects grease buildup
- How cabinet surface texture changes cleaning difficulty
- How to balance luxury appearance with long-term maintenance
For B2B projects such as apartments, villas, hotels, and commercial residences, the right cabinet finish can reduce maintenance costs and improve long-term user satisfaction.